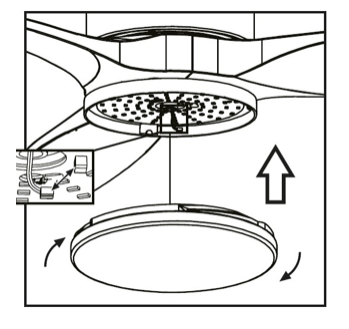
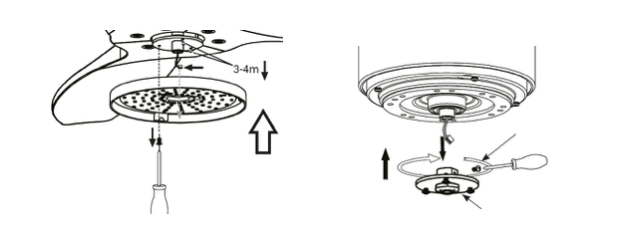
Is your ceiling fan clicking or humming? Follow our 8-step guide to pinpoint the noise source and restore silent...
Search in blog
Blog categories
Latest posts

Noisy ceiling fan? 8 steps to make it silent
Read more

How to Repair a Ceiling Fan That Won’t Spin?
Read more
Discover our detailed guide to diagnose and repair your non-working ceiling fan. Simple solutions and expert advice...

Choosing Your Ceiling Fan: Infographic
Read more
Discover how to easily choose your ceiling fan with our infographic. Let us guide you!

Which direction should a ceiling fan turn in summer and winter?
Read more
Understanding the correct blade rotation direction is crucial for optimizing its efficiency. During the summer...

How to choose the size of your ceiling fan? How to choose the size of your ceiling fan?
Read more
The dimensions of your ceiling fan in relation to the size of your room and your mode of use are of crucial...
Popular posts
Which direction should a ceiling fan turn in summer and winter?
Understanding the correct blade rotation direction is crucial for optimizing its efficiency. During the summer...
Read more

Complete Guide to Choosing the Ideal Ceiling Fan
When it comes to cooling your interior, the ceiling fan is both an aesthetic and functional solution. Ideal for hot...
Read more

Why is my ceiling fan moving? Causes and solutions
Discover in this article how to identify and fix issues with ceiling fans that wobble.
Read more

How much does a ceiling fan consume?
Discover how ceiling fans influence your energy consumption. This article explains their operation, analyzes their...
Read more
How to Repair a Ceiling Fan That Won’t Spin?
Discover our detailed guide to diagnose and repair your non-working ceiling fan. Simple solutions and expert advice...
Read more
Featured posts
Noisy ceiling fan? 8 steps to make it silent
Is your ceiling fan clicking or humming? Follow our 8-step guide to pinpoint the noise source and restore silent...
Read more
How to Repair a Ceiling Fan That Won’t Spin?
Discover our detailed guide to diagnose and repair your non-working ceiling fan. Simple solutions and expert advice...
Read more
Choosing Your Ceiling Fan: Infographic
Discover how to easily choose your ceiling fan with our infographic. Let us guide you!
Read more
Which direction should a ceiling fan turn in summer and winter?
Understanding the correct blade rotation direction is crucial for optimizing its efficiency. During the summer...
Read more
How to choose the size of your ceiling fan? How to choose the size of your ceiling fan?
The dimensions of your ceiling fan in relation to the size of your room and your mode of use are of crucial...
Read more
Photo gallery
No featured images